

How do Developers with poor Photoshop skills edit pictures beautifully?
Image processing or “image filtering” refers to modifying an image. It’s a key topic in image editing and computer vision, where it may be used to reduce noise or enhance certain features, among other things. The basic unit of image filtering is the kernel, which is the topic of today’s post. Before we get into kernels proper, however, let’s first ensure that we have a good understanding of what an image actually is.
What is an image?
Consider the following photograph of a pastry.
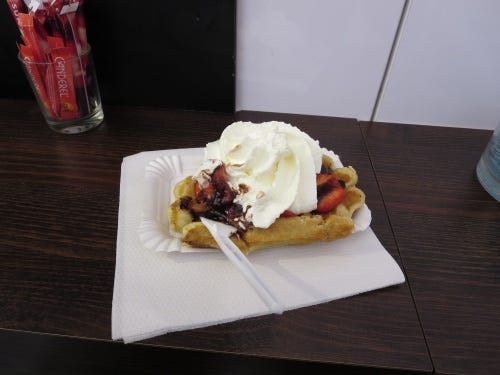
A digital image consists of pixels. In a color image, like the one above, each pixel is usually described in terms of the RGB color space. In other words, each pixel is represented by three channels: red, green, and blue. The bit depth, or color depth, of an image determines the range of values each channel can take on. In an 8-bit image, each channel can take on 28 = 256 values, from 0 to 255. 0 indicates that the intensity of a particular color is zero (black), and 255 indicates that the intensity of a particular color is maximum. So, for example, [R=0, G=0, B=0] would be black, [R=255, G=0, B=0] would be bright red, [R=0, G=0, B=255] would be bright blue, [R=127, G=0, B=127] would be an intermediate shade of purple, and so on.
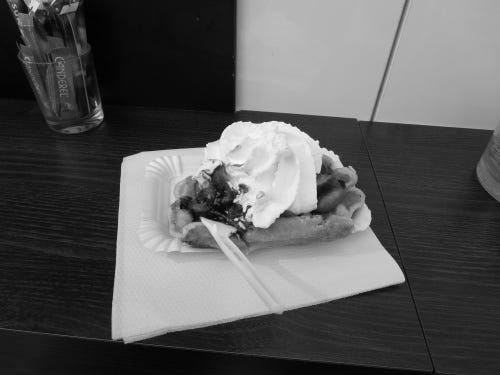
In a grayscale 8-bit image, there’s only one channel, and its intensity is represented by a value from 0 to 255, where 0 is black, 255 is white, and there are 254 shades of gray in between (which happens to be 204 more than the title of a certain novel). This is what the image above looks like when converted to grayscale:
If we zoom in on a 20 pixel x 20 pixel region of this image, we can discern the individual pixels that form the image, like so:
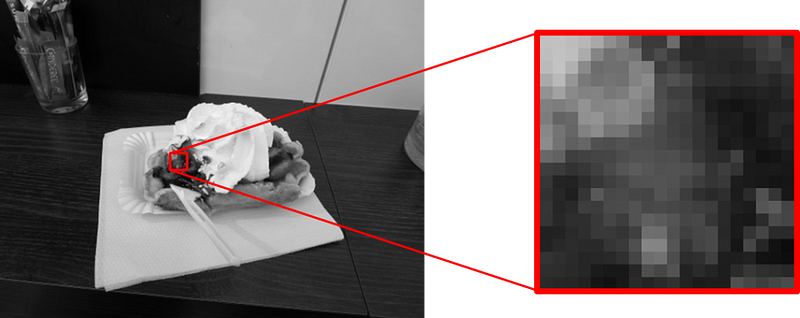
While we see each pixel as a hue of gray, remember that, as we just discussed, each pixel is actually represented digitally by a number from 0 to 255. That means the digital representation of the 20 x 20 selection of the image looks like this:
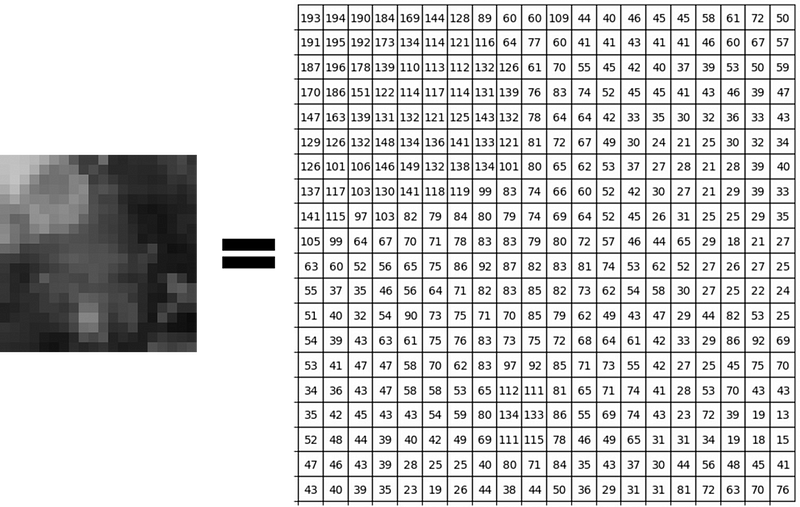
Notice how brighter pixels have higher values, corresponding to higher intensities. Conversely, darker pixels have lower values, corresponding to lower intensities. If we were looking at the color version of the image, each pixel would have three numbers (RGB) instead of just one. I chose the grayscale version as an example because it’s easier to visualize, but the RGB representation, or any other color space, for that matter, works essentially the same way, regardless of the number of channels.
The kernel
A kernel is essentially a mask or a filter that modifies the value of a pixel based on the values of its surrounding pixels. These surrounding pixels are termed the central pixel’s “neighborhood pixels.” Let’s zoom in further and examine an arbitrary 3×3 square neighborhood from our previous selection:

Here, we’re examining the neighborhood of the central pixel, which has a value of 99. The kernel will utilize the values from each pixel in the neighborhood (including the central pixel) to determine the new value for the central pixel. So, what does the kernel actually look like? A kernel is a matrix of the same shape as the neighborhood, and the value of each element of the kernel represents the weight given to the corresponding pixel from the neighborhood. A 3×3 kernel has the following basic form:
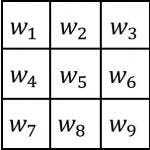
where w1 through w9 are the weights given to each pixel in the neighborhood. The pixel in the upper left corner would be given weight w1, the central pixel would be given weight w5, and so on. Representing the neighborhood in a similar fashion with the letters “a” through “g”:
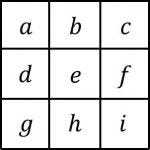
where e is the central pixel (corresponding to the pixel with a value of 99 from the example above) and the others are its neighborhood pixels. Then the convolution of the neighborhood with the kernel is written as:
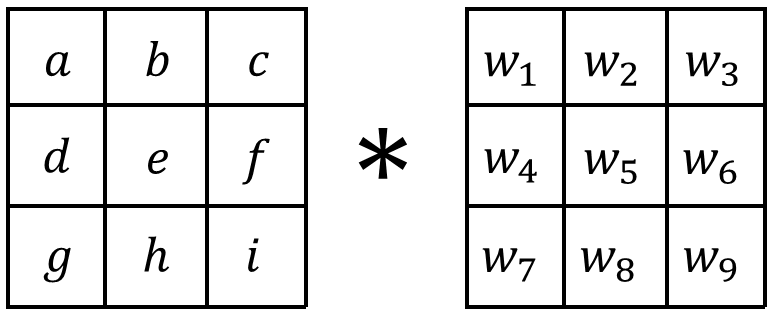
where ∗ is the convolution symbol. The new value of the central pixel is the weighted sum of all the pixels in the neighborhood. In other words, the new value is given by the sum of the elements resulting from element-wise multiplication of the two matrices:
enew=w1a+w2b+w3c+w4d+w5e+w6f+w7g+w8h+w9i
Going back to our example, let’s apply a standard 3×3 sharpen kernel. A sharpen kernel ignores the four corner pixels, subtracts the value of each pixel directly adjacent the central pixel, and multiplies the value of the central pixel by 5:
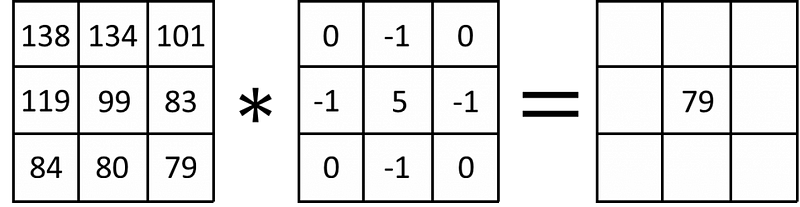
Writing this out: (−1)(134)+(−1)(83)+(−1)(80)+(−1)(119)+(5)(99)=79.
This is done for every pixel of the source image to find the new value of each pixel in the resulting image. Here’s what applying a sharpen filter to an entire image looks like:
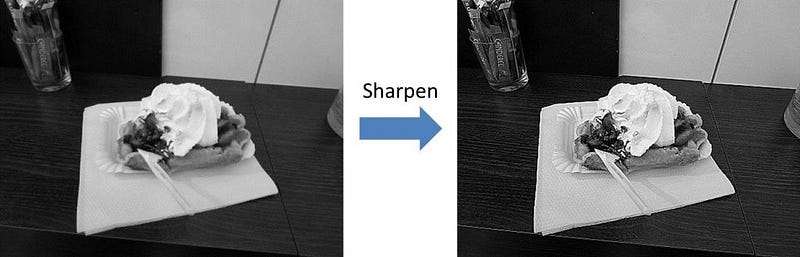
The comparison doesn’t require much commentary. By increasing the intensity of each pixel relative to its neighbors, the resulting image appears considerably sharper than the original. What if we want to blur the image? This is what a standard “box blur” convolution looks like:
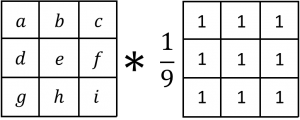
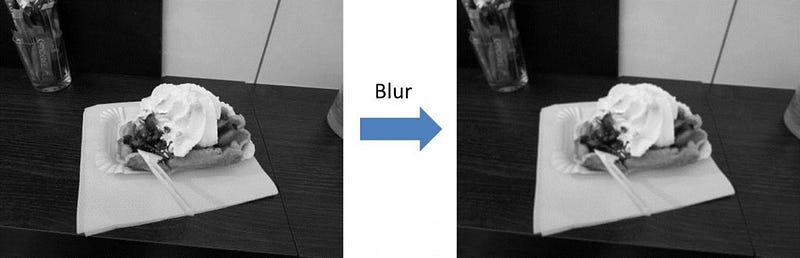
With a box blur, we set the value of the central pixel equal to the average of all the pixels in its neighborhood (hence the division by 9). In essence, this “dilutes” each pixel. This is what it looks like applied to a whole image:
What if we want to blur the image more? Well, this is what happens when the size of the kernel (and the neighborhood) is increased to 5×5:
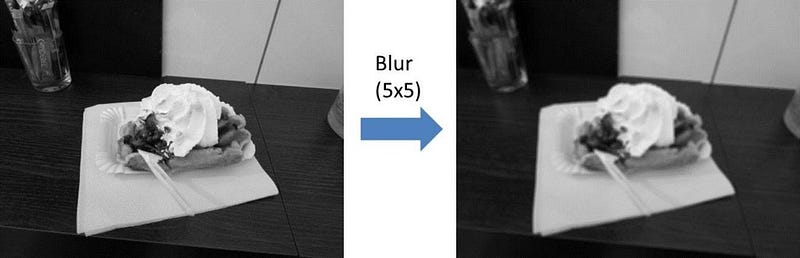
Generally, increasing the size of the kernel/neighborhood amplifies the effect of the kernel.
We’ve just barely scratched the surface. There exist numerous other kernels for performing a wide variety of image modifications. Fun fact: if you’ve ever used the filters (like sharpen or blur) in an image editor like Photoshop, these kernels and convolutions are what the software is running under the hood. In fact, programs like Photoshop and GIMP allow you to create custom filters by supplying your own kernel. Since kernels and convolutions are also ubiquitous in computer vision.