

Next.js provides a solution to all of the commonly faced problems during development with React.js. But more importantly, it puts you and your team in the pit of success when building React applications.
Next.js has the best-in-class “Developer Experience” and many built-in features;
To name a few of them:
- An intuitive page-based routing system (with support for dynamic routes)
- Pre-rendering, both Static Site Generation (SSG) and Server-side Rendering (SSR) are supported on a per-page basis
- Automatic code splitting for faster page loads
- Client-side routing with optimized prefetching
- Built-in CSS and Sass support, and support for any CSS-in-JS library
- Development environment which supports Hot Module Replacement
- API routes to build API endpoints with Server-less Functions
- Fully extendable
This is the primary reason why Next.js is used in tens of thousands of production-facing websites and web applications, including many of the world’s largest brands.
Lets see the NEXT.js in action by setting up a quick app to demonstrate basic along with a few advanced functionalities..
Development ENV Setup
- You will need to have Node.js version 10.13 or higher installed on your system to proceed. You can install it from here, in case you don’t have already.
- VS-Code, or any editor of your choice.
Creating a Next.js app
To create a Next.js app, open your terminal, cd into the directory you’d like to create the app in, and run the following command:
npm init next-app nextjs-blog --example "https://github.com/zeit/next-learn-starter/tree/master/learn-starter"Behind the scene you are instructingnpmto initialize a new next app withinnextjs-blogfolder. This basically uses the tool calledcreate-next-app,
which bootstraps a Next.js app for you.
It uses this template through the--exampleflag.
If it doesn’t work, please take a look at this page.
Once this command completes you will see a new folder created with name nextjs-blog.
Running the app
Let’s cd into your newly created folder by using the following command:cd nextjs-blog
Then, run the following command:
npm run devThis starts your Next.js app’s “development server” on port 3000.
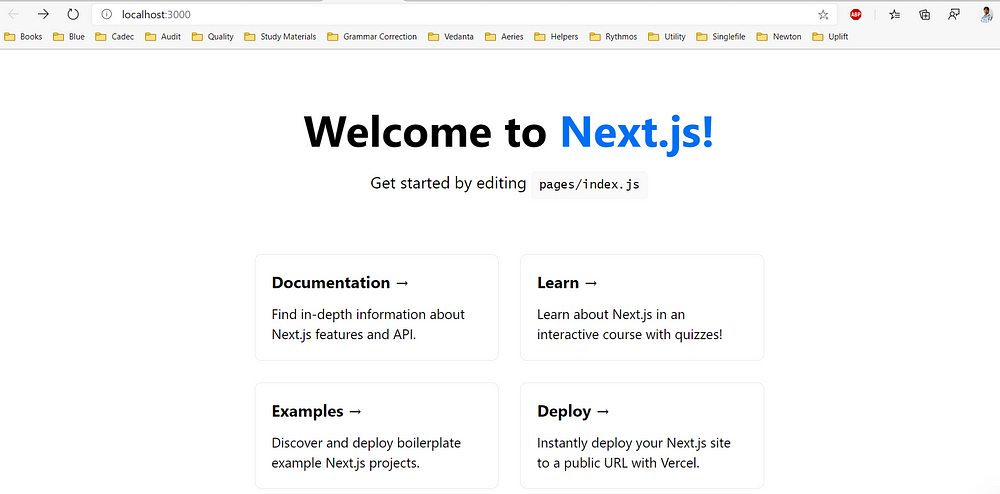
Open http://localhost:3000 from your browser to see it in action.
If everything goes as expected you will see the following screen in your browser:
The Next.js development server has the Hot Reloading feature. When you make changes to files Next.js automatically applies the changes in the browser. No refresh needed! This will help you iterate on your app quickly.
Creating Pages
In Next.js, a page is a React Component exported from a file in the pages directory.
All pages are associated with a route based on their file name by default.
pages/index.jsis associated with the/route.pages/users.jsis associated with/usersroute.pages/posts/first-post.jsis associated with the/posts/first-postroute.
Go ahead and try adding some by yourself and see how it reacts. Once done you can proceed to next section.
Manual Routing in Next.js
When linking between pages on websites you generally use the <a> HTML tag.
In Next.js, you use the <Link> React Component that wraps the <a> tag. <Link> allows you to do client-side navigation to a different page in the application.
Lets see it in action:
First, in pages/index.js, import the Link component from next/link by adding this line at the top:
import Link from 'next/link'Then modify this line in the h1 tag to look like this:
Read <Link href="/posts/first-post"><a>this page!</a></Link>Considering you have created a first-post.js as suggested above, lets replace the content with the following.
import Link from 'next/link'export default function FirstPost() { return ( <div> <h1>First Post</h1> <p>Hey there, I am a newly created Post.</p> <br/> <h2> <Link href="/"> <a>Navigate to home</a> </Link> </h2> </div> )}As you can see, the Link component is similar to using <a> tags, but instead of<a href="…">, you use <Link href="…"> and put an <a> tag inside.
Let’s check to see it works. You now should have a link on each page, allowing you to go back and forth:

A few quick notes about navigation:
- Client-side navigation means that the page transition happens using JavaScript, which is faster than the default navigation done by the browser.
- If you’ve used
<a href="…">instead of<Link href="…">and did this, the browser does the full refresh. but in our case it’s not the case.
If you want to ensure this, use the browser’s developer tools to change the background CSS property of <html> to blue. Click on the links to go back and forth between the two pages. You’ll see that the blue background persists between page transitions. This ensures that the page is not being reloaded.
Code splitting and prefetching
Next.js does code splitting automatically, so each page only loads what’s necessary for that page. That means when the homepage is rendered, the code for other pages is not served initially.
This ensures that the homepage loads quickly even if you add hundreds of pages.
Only loading the code for the page you request also means that pages become isolated. If a certain page throws an error, the rest of the application would still work.
Furthermore, in a production build of Next.js, whenever Link components appear in the browser’s viewport, Next.js automatically prefetches the code for the linked page in the background. By the time you click the link, the code for the destination page will already be loaded in the background, and the page transition will be near-instant!
Summary
Next.js automatically optimizes your application for the best performance by code splitting, client-side navigation, and prefetching (in production).
You create routes as files under pages and use the built-in Link component. No routing libraries are required.
You can learn more about the Link component in the API reference documentation and routing in general in the routing documentation.
Note: If you need to link to an external page outside the Next.js app, just use an<a>tag withoutLink.
If you need to add attributes like,className, add it to theatag, not to theLinktag.
Stay tuned. In the next part, we will learn about, Dynamic routing, Assets, Metadata, and CSS.
Thank you for going through this. Hope you must have enjoyed this! :)