
In this article, you will learn
1. Environment setup (Windows 10)
2. Preparing datasets
3. Setting up the algorithm
4. Setting up local deployment using Django
5. Pushing the source to Git
6. Setting up Azure Virtual Machine
7. Installing desktop environment in Ubuntu VM
8. Accessing the Application Globally
Environment setup
Download and Install Python 3.x from python.org/downloads
Add path to environmental variables.
Install tensorflow using the command “pip install tensorflow” and tensorflow hub “pip install tensorflow_hub” (Windows 10)
To install tensor flow in Linux use this commands
pip3 install tensorflowpip3 install tensorflow_hub
To test if tensorflow is installed properly, run these commands on terminal
Ø python
Ø import tensorflow
If this doesn’t flow an error, you are good to go further.

Preparing the datasets
One of the hardest problems to solve in deep learning/ machine learning has nothing to do with neural nets: it’s the problem of getting the right data in the right format.
Getting the right data means gathering or identifying the data that correlates with the outcomes you want to predict; i.e. data that contains a signal about events you care about. The data needs to be aligned with the problem you’re trying to solve. For example, Kitten pictures are not very useful when you’re building a facial identification system. Verifying that the data is aligned with the problem you seek to solve must be done by a data scientist. If you do not have the right data, then your efforts to build an AI solution must return to the data collection stage.
The right end format for machine learning is generally a tensor, or a multi-dimensional array. So, data pipelines built for machine learning will generally convert all data — be it images, video, sound, voice, text or time series — into vectors and tensors to which linear algebra operations can be applied.
Deep learning, and machine learning more generally, needs a good training set to work properly. Collecting and constructing the training set — a sizable body of known data — takes time and domain-specific knowledge of where and how to gather relevant information. The training set acts as the benchmark against which deep-learning nets are trained. That is what they learn to reconstruct before they’re unleashed on data they haven’t seen before.
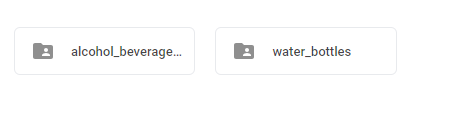
In this blog, I will be talking about simple image classification. We take a bottle dataset, where bottles are classified into two types “water_bottles” and “alcohol_beverage_bottles”
Download the data sets from here.
The datasets are divided into Training, Testing and Validation. We will use the training dataset(generally huge) to training our algorithm. 10–30% size of the training dataset will be used for testing the algorithm.
Setting up the algorithm and Training
Place the images into different folder for each class as following.
Let’s get the sample training code ready.
From the tensorflow hub get the training algorithm ‘retrain.py’
Retraining also known as Transform Learning train the customized graph based on Inception which is one of the best Google image classifier. It help us training more accuracy classifier with less effort according our input data.
Run the following command for retraining the model.
python {$your-working_directory}/retrain.py— bottleneck_dir=/{$your-working_directory}/bottlenecks— how_many_training_steps 500— model_dir=/{$your-working_directory}/inception— output_graph=/{$your-working_directory}/retrained_graph.pb— output_labels=/{$your-working_directory}/retrained_labels.txt— image_dir /{$your-working_directory}/${your_training_data_path}
While retrain begins, you will see some bottlenecks being created. The bottlenecks are the last layer before the final layer of the Inception model which will classify your training images.
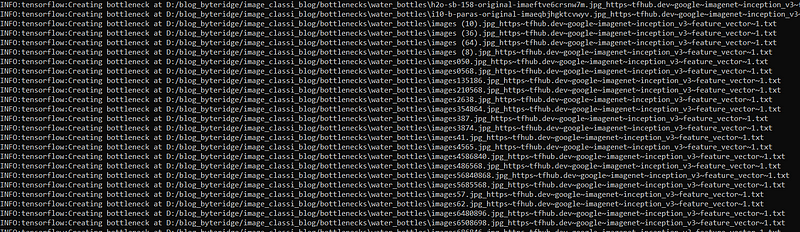
After the bottlenecks training is over, the final layer gets trained and you will see validation accuracy as shown below. At the end, you will see “Final test accuracy” and there would be two more files: “retrained_graph.pb” and “retrained_labels.txt” in your working directory.
We will use these two files in the future to develop client applications
Setting up local deployment using Django
Let us use these generated files to host application on Django. Place the generated files in “classify_image\inception_model” folder.
We have loaded the requirements in requirements.txt. Run the command to install necessary requirements in to your machine.
pip install -r requirements.txt
python manage.py migratepython manage.py collectstatic# to run server
python manage.py runserverthis application will run from 127.0.0.1:8000
you may attach your custom URL to run it from a different port
python manage.py runserver 127.0.0.1:8001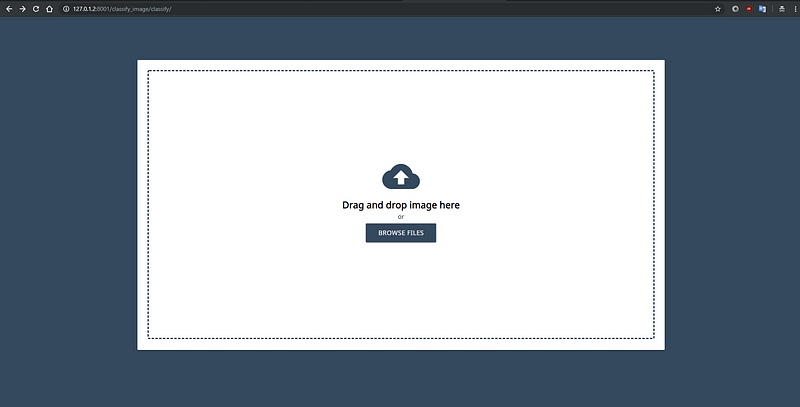
Hosted DJango application consuming the generated trained graph files.
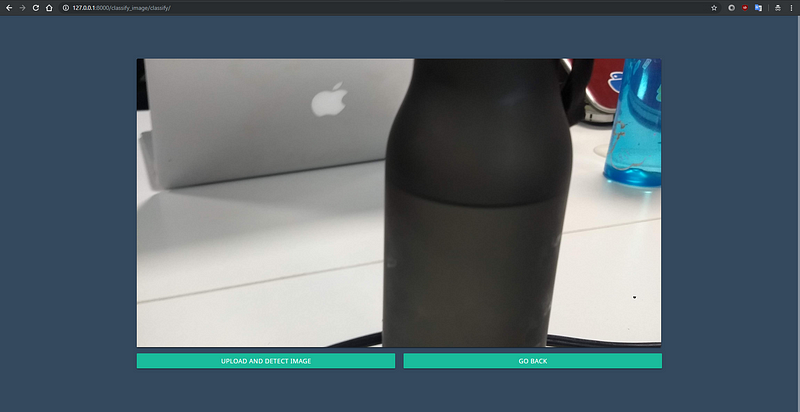
Sample water bottle image uploaded to verify.
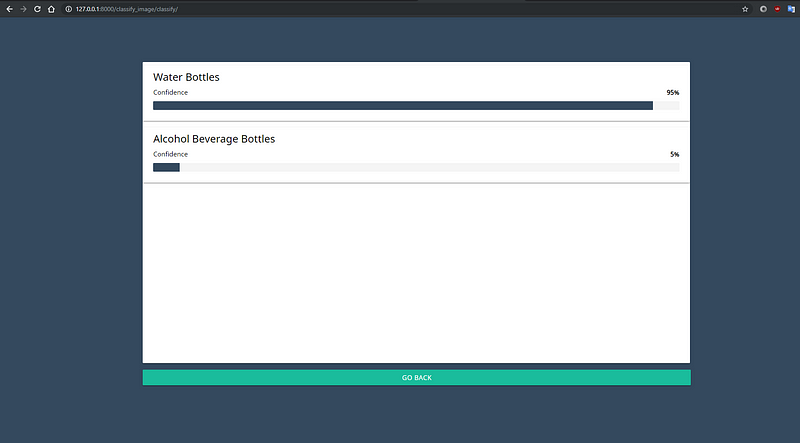
Uploaded picture is detected with water bottle with a confidence of 95%
Pushing the source to GIT
Push the source code to git. This will be used to sync the Project with our deployment resource.
Setting up Azure VM
You may follow the simple instructions to setup a vm on Azure.
https://docs.microsoft.com/en-us/azure/virtual-machines/linux/quick-create-portal
Installing desktop environment in Ubuntu Vm
These VMs generally come with SSH access only. In order to host this through, we do a simple hack. Install Desktop environment.
sudo apt-get install lxde -ysudo apt-get install xrdp -y
access the terminal and clone the repo exactly in to your ubuntu file system.
Accessing Application Globally
Re run the following commands to run the Application
pip install -r requirements.txt
python manage.py migratepython manage.py collectstatic# to run the server and make it available over the internet add 0.0.0.0:80
python manage.py runserver 0.0.0.0:80You may use the public Ip address of the VM to access the website globally. You may still consider adding DNS service and custom domain service.